# Step 1: Adding a Web App Manifest
Let's start by creating the manifest file. This file is defined by MDN (opens new window) as follows:
The web app manifest provides information about an application (such as name, author, icon, and description) in a JSON text file.
The presence of a manifest also provides other benefits. Here are a few:
- Supported browsers can install the PWA and add a shortcut on the home screen
- The PWA can be referenced on some app stores such as the Windows Store (opens new window).
- The PWA can be displayed in full screen or in a standalone window, without the browser UI.
# Manifest fields
The manifest is a JSON file that contains several properties. It is recommended to fill in most of them to optimize the discovery and the experience of the PWA. Here are all the fields currently specified (opens new window):
name- displayed on the splash-screen below the app iconshort_name- displayed below the shortcut on the desktop or on the home screendescription- a general description of the applicationstart_url- the URL that is loaded first when you open the application from its shortcutscope- the pages of the site that are part of the PWA experience. The"."value includes everything in the manifest directory and subdirectories. It is therefore more relevant to place the latter at the root of the sitebackground_color- the background color of the splash-screentheme_color- the general theme color of the application, used in the status bars for example if they are displayeddisplay- specifies the display mode. Here are the different modes available sorted by order of fallback:fullscreen: all of the available display area is used and no browser UI is shown.standalone: look and feel like a standalone application. This means that the application will have its own window, its own icon in the launcher, and so on. In this mode, the user agent will exclude UI elements for controlling navigation, but can include other UI elements such as a status bar.minimal-ui: the application will look and feel like a standalone application, but will have a minimal set of UI elements for controlling navigation. These elements will vary by browser and system.browser(default): the application opens in a conventional browser tab or new window, depending on the browser and platform.
orientation- defines the default orientation for mobile devices:any,natural,landscape,portrait...dir- specifies the primary text direction for the name and description fields:ltr,rtlorauto.lang- the main language of the application.related_applications- an array of native applications that are installable by the underlying platform and are intended to be alternatives to the PWA that provides similar/equivalent functionality. Ignore if there is no native application.icons- list of application icons of different resolutions, used for shortcut and splashscreen. The recommended sizes to be supplied are at least 192x192px and 512x512px. The device will automatically pick the best icon depending on the case. It is also interesting to provide a SVG vector version of the icon that will fit a maximum of sizes.screenshots- list of screenshots of the application in different form factors, shown in some web application stores or in the install prompt UI for some browsers.
You can find a more complete article on web app manifest and all its properties on web.dev (opens new window)
# Using a manifest generator
Since the application manifest is a text file, you can choose to write it by hand or use a tool that simplifies its creation. Several tools are available online:
- https://app-manifest.firebaseapp.com/ (opens new window)
- Web App Manifest Generator (opens new window).
Using one of these tools, generate a manifest file for the app. Your manifest should at least contain the following properties: name,short_name, lang,start_url, display: 'standalone', theme_color and icons with at least two PNG icons sized 192x192px and 512x512px and one SVG version.
TIP
To save time, you can find example icons with the required dimensions in the app/icons folder.
The manifest can then be saved in a text file called manifest.json in the app root folder.
See the solution
{
  "name": "Progressive Web Apps Workshop",
  "short_name": "PWA Workshop",
  "lang": "fr",
  "start_url": "/",
  "display": "standalone",
  "theme_color": "pink",
  "icons": [
    {
      "src": "icons/logo-192.png",
      "sizes": "192x192"
    },
    {
      "src": "icons/logo-512.png",
      "sizes": "512x512"
    },
    {
      "src": "icons/logo.svg",
      "sizes": "513x513"
    }
  ]
}
# Adding the manifest in the application
The last step is to reference the manifest in the HTML page of our application, using a link tag in the <head> section : <link rel="manifest" href="manifest.json">.
Note that other metadata are also used by some browsers and may be useful. It is likely that in the future, these metadata will tend to disappear in favor of new fields in the web app manifest. Here is an example:
<link rel="manifest" href="manifest.json" />
<meta name="mobile-web-app-capable" content="yes" />
<meta name="apple-mobile-web-app-capable" content="yes" />
<meta name="application-name" content="PWA Workshop" />
<meta name="apple-mobile-web-app-title" content="PWA Workshop" />
<meta name="msapplication-starturl" content="/index.html" />
<meta
  name="viewport"
  content="width=device-width, initial-scale=1, shrink-to-fit=no"
/>
# Testing
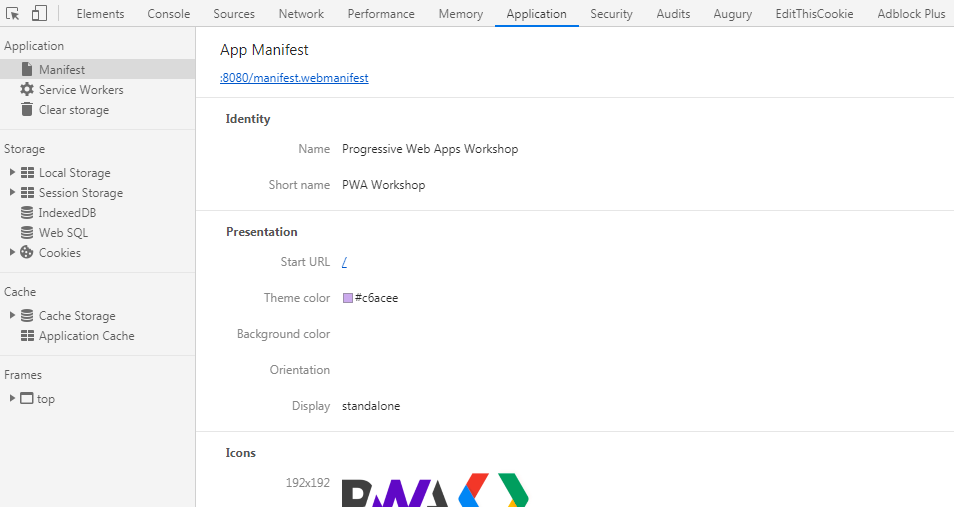
You can check that the manifest is retrieved correctly by looking in the Applications tab of Chrome Developer Tools. The list of manifest properties should be displayed.
# PWA compatibility library
Some browsers do not support yet some PWA features. For example, there is not splash-screen support in mobile Safari 12. The library pwacompat (opens new window) by Google Chrome Labs fixes some of these issues.